> ## Documentation Index
> Fetch the complete documentation index at: https://docs.researchanddesire.com/llms.txt
> Use this file to discover all available pages before exploring further.
# Suction Cup Bracket
> Mount heavy‑duty suction cups to 4040 aluminum extrusion for a stable, removable attachment point.
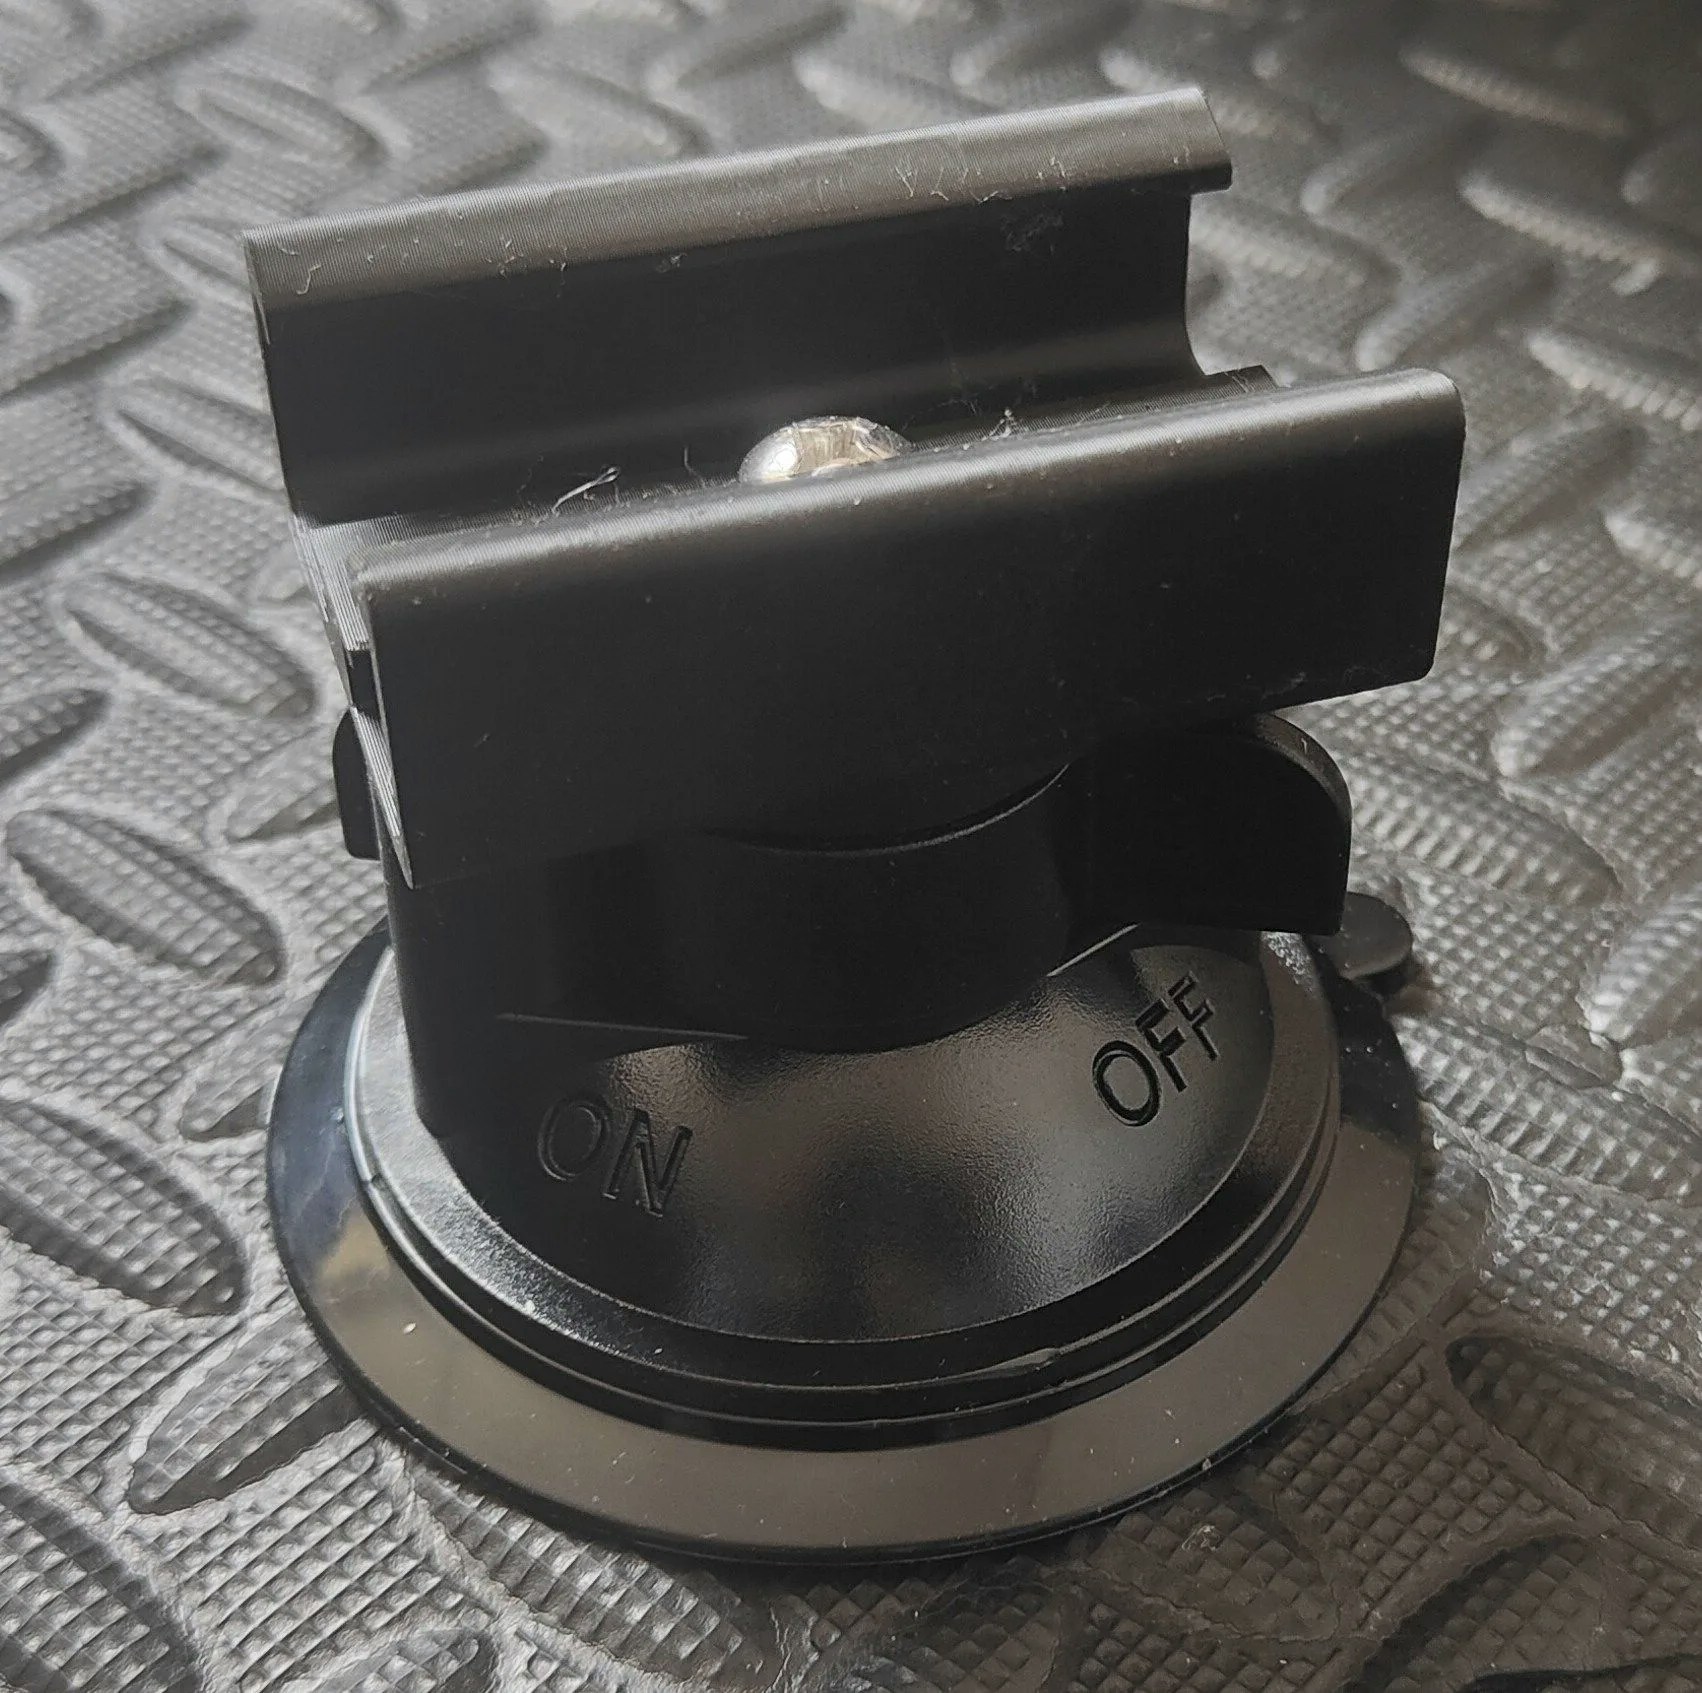 This bracket lets you attach heavy‑duty suction cups to 4040 aluminum extrusion, creating a solid, repositionable mounting point on smooth, non‑porous surfaces.
## Features
* Strong, temporary hold on smooth, non‑porous surfaces (glass, sealed metal, glazed tile)
* Maintains extrusion‑mount stability when properly installed
* Compatible with 4040 aluminum extrusion; validated with Type I profile
* Installs in minutes using basic hand tools
For maximum stability on an extrusion‑based stand, use four suction cups distributed across your mount.
## Compatibility
* Extrusion: 4040 aluminum extrusion (Type I profile recommended)
* Suction cup: 1/4‑20 threaded stud or 1/4‑20 female insert
* Hardware interface: 1/4‑20 fastener for the cup; M6 T‑nuts/bolts for typical 4040 extrusion slots
The bracket mounts to your existing extrusion hardware. If you need spares, keep two M6 T‑nuts and two M6×12 (or similar) bolts on hand for each bracket.
## Bill of materials
You need the following parts for each bracket:
| Part | Quantity | Notes |
| -------------------------------------------- | -------: | ------------------------------------------------------------ |
| Heavy‑duty suction cup with 1/4‑20 interface | 1 | Stud or female insert, rated for smooth, non‑porous surfaces |
| 1/4‑20 × 5/8" screw | 1 | Button or hex head; use with threadlocker if desired |
| M6 T‑nut (for 4040 extrusion) | 2 | Optional if you don’t already have spares |
| M6×12 bolt | 2 | Optional; matches the T‑nuts above |
Suction cups can release unexpectedly if the surface is dirty, textured, or if temperature/humidity changes occur. Do not use for overhead loads or in situations where unexpected release could cause injury or damage.
## Installation
* Clean the target surface with isopropyl alcohol and a lint‑free cloth; let it dry.
* Inspect the suction cup for nicks or debris on the sealing lip.
* Gather: bracket, suction cup, 1/4‑20 × 5/8" screw, two M6 T‑nuts, two M6×12 bolts, hex keys.
The surface should be smooth, dry, and free of dust or oils.
* Insert the 1/4‑20 screw through the bracket and into the suction cup’s threaded interface.
* Tighten until snug (finger‑tight plus a quarter‑turn). Avoid over‑tightening which can deform the cup mount.
* Slide two M6 T‑nuts into the 4040 extrusion slot.
* Align the bracket holes with the T‑nuts and install the M6×12 bolts.
* Tighten evenly until the bracket is secure and cannot slide.
* Lightly moisten the cup’s rim (water only, no oils), press firmly against the surface, and engage the cup’s lever (if present).
* Perform a firm pull test to confirm a solid seal.
After 5 minutes, re‑check for any movement or loss of vacuum. Re‑seat if needed.
## Best practices
* Place cups on flat, non‑textured, non‑porous surfaces only
* Distribute multiple cups to spread load and reduce peel forces
* Re‑seat cups if they have been loaded continuously for a long period
* Use medium‑strength threadlocker on the 1/4‑20 screw if you see loosening from vibration
- Ensure the glass is tempered/thick enough for expected forces
- Avoid mounting near edges where peel forces are highest
* Remove waxes/polishes; they can cause slow leaks
* On tile, avoid grout lines and textures
* Verify the finish is smooth and fully cured
* Test adhesion in an inconspicuous spot first
## Troubleshooting
* Clean both the surface and cup rim thoroughly
* Try a different surface; micro‑texture or matte coatings reduce adhesion
* Lightly moisten the rim with water and re‑seat with firm pressure
* Confirm you are using the correct T‑nuts for 4040
* Tighten both bolts evenly; add a star washer if needed for extra bite
* Apply medium threadlocker to the 1/4‑20 screw and M6 bolts
* Re‑check tightness at the start of each session
## Printed parts and CAD files
| Part | Files |
| -------------------------------------- | --------------------------------------------------------------------------------------------------------------------------------------------------------------------------------------------------------------------------------------------------------------------------------------------------------------------------------------------------------------------------------------- |
| Suction Cup Bracket (4040 Aluxprofile) | [STEP](https://github.com/KinkyMakers/OSSM-hardware/blob/main/Printed%20Parts/OSSM%20Mods/SaladDressing%27s%20Mods/Suction%20Cup%20Bracket/SuctionCupBracket%20-%204040%20Aluxprofile.step) / [STL](https://github.com/KinkyMakers/OSSM-hardware/blob/main/Printed%20Parts/OSSM%20Mods/SaladDressing%27s%20Mods/Suction%20Cup%20Bracket/SuctionCupBracket%20-%204040%20Aluxprofile.stl) |
| Suction Cup Bracket (3030, by @neos) | [STEP](https://github.com/KinkyMakers/OSSM-hardware/blob/main/Printed%20Parts/OSSM%20Mods/SaladDressing%27s%20Mods/Suction%20Cup%20Bracket/SuctionCupBracket%20-%203030%20Amazon%20by%20neos.step) |
## Related
Overview of extrusion and basic mounts for OSSM.
Bill of materials and hardware used across our extrusion‑based mounts.
Looking for community tips and real‑world mounting examples? Join our Kinky Makers Discord.
This bracket lets you attach heavy‑duty suction cups to 4040 aluminum extrusion, creating a solid, repositionable mounting point on smooth, non‑porous surfaces.
## Features
* Strong, temporary hold on smooth, non‑porous surfaces (glass, sealed metal, glazed tile)
* Maintains extrusion‑mount stability when properly installed
* Compatible with 4040 aluminum extrusion; validated with Type I profile
* Installs in minutes using basic hand tools
For maximum stability on an extrusion‑based stand, use four suction cups distributed across your mount.
## Compatibility
* Extrusion: 4040 aluminum extrusion (Type I profile recommended)
* Suction cup: 1/4‑20 threaded stud or 1/4‑20 female insert
* Hardware interface: 1/4‑20 fastener for the cup; M6 T‑nuts/bolts for typical 4040 extrusion slots
The bracket mounts to your existing extrusion hardware. If you need spares, keep two M6 T‑nuts and two M6×12 (or similar) bolts on hand for each bracket.
## Bill of materials
You need the following parts for each bracket:
| Part | Quantity | Notes |
| -------------------------------------------- | -------: | ------------------------------------------------------------ |
| Heavy‑duty suction cup with 1/4‑20 interface | 1 | Stud or female insert, rated for smooth, non‑porous surfaces |
| 1/4‑20 × 5/8" screw | 1 | Button or hex head; use with threadlocker if desired |
| M6 T‑nut (for 4040 extrusion) | 2 | Optional if you don’t already have spares |
| M6×12 bolt | 2 | Optional; matches the T‑nuts above |
Suction cups can release unexpectedly if the surface is dirty, textured, or if temperature/humidity changes occur. Do not use for overhead loads or in situations where unexpected release could cause injury or damage.
## Installation
* Clean the target surface with isopropyl alcohol and a lint‑free cloth; let it dry.
* Inspect the suction cup for nicks or debris on the sealing lip.
* Gather: bracket, suction cup, 1/4‑20 × 5/8" screw, two M6 T‑nuts, two M6×12 bolts, hex keys.
The surface should be smooth, dry, and free of dust or oils.
* Insert the 1/4‑20 screw through the bracket and into the suction cup’s threaded interface.
* Tighten until snug (finger‑tight plus a quarter‑turn). Avoid over‑tightening which can deform the cup mount.
* Slide two M6 T‑nuts into the 4040 extrusion slot.
* Align the bracket holes with the T‑nuts and install the M6×12 bolts.
* Tighten evenly until the bracket is secure and cannot slide.
* Lightly moisten the cup’s rim (water only, no oils), press firmly against the surface, and engage the cup’s lever (if present).
* Perform a firm pull test to confirm a solid seal.
After 5 minutes, re‑check for any movement or loss of vacuum. Re‑seat if needed.
## Best practices
* Place cups on flat, non‑textured, non‑porous surfaces only
* Distribute multiple cups to spread load and reduce peel forces
* Re‑seat cups if they have been loaded continuously for a long period
* Use medium‑strength threadlocker on the 1/4‑20 screw if you see loosening from vibration
- Ensure the glass is tempered/thick enough for expected forces
- Avoid mounting near edges where peel forces are highest
* Remove waxes/polishes; they can cause slow leaks
* On tile, avoid grout lines and textures
* Verify the finish is smooth and fully cured
* Test adhesion in an inconspicuous spot first
## Troubleshooting
* Clean both the surface and cup rim thoroughly
* Try a different surface; micro‑texture or matte coatings reduce adhesion
* Lightly moisten the rim with water and re‑seat with firm pressure
* Confirm you are using the correct T‑nuts for 4040
* Tighten both bolts evenly; add a star washer if needed for extra bite
* Apply medium threadlocker to the 1/4‑20 screw and M6 bolts
* Re‑check tightness at the start of each session
## Printed parts and CAD files
| Part | Files |
| -------------------------------------- | --------------------------------------------------------------------------------------------------------------------------------------------------------------------------------------------------------------------------------------------------------------------------------------------------------------------------------------------------------------------------------------- |
| Suction Cup Bracket (4040 Aluxprofile) | [STEP](https://github.com/KinkyMakers/OSSM-hardware/blob/main/Printed%20Parts/OSSM%20Mods/SaladDressing%27s%20Mods/Suction%20Cup%20Bracket/SuctionCupBracket%20-%204040%20Aluxprofile.step) / [STL](https://github.com/KinkyMakers/OSSM-hardware/blob/main/Printed%20Parts/OSSM%20Mods/SaladDressing%27s%20Mods/Suction%20Cup%20Bracket/SuctionCupBracket%20-%204040%20Aluxprofile.stl) |
| Suction Cup Bracket (3030, by @neos) | [STEP](https://github.com/KinkyMakers/OSSM-hardware/blob/main/Printed%20Parts/OSSM%20Mods/SaladDressing%27s%20Mods/Suction%20Cup%20Bracket/SuctionCupBracket%20-%203030%20Amazon%20by%20neos.step) |
## Related
Overview of extrusion and basic mounts for OSSM.
Bill of materials and hardware used across our extrusion‑based mounts.
Looking for community tips and real‑world mounting examples? Join our Kinky Makers Discord.