> ## Documentation Index
> Fetch the complete documentation index at: https://docs.researchanddesire.com/llms.txt
> Use this file to discover all available pages before exploring further.
# Purchasing Components
> Complete list of purchased components required to build your OSSM, including motor, PCB, belts, bearings, and hardware
## Bill of materials (purchased components)
Use this checklist to buy all non-printed parts for the official OSSM home-assembly configuration. Printed parts, linear rail, and extrusion mounts are covered separately in the mounting guides.
For variations (different mounts, hardware layouts, or rail lengths), see OSSM Mounting
. If you’re buying our bundles, see the Purchase Guide for the OSSM Home Assembly Kit
.
### Motor
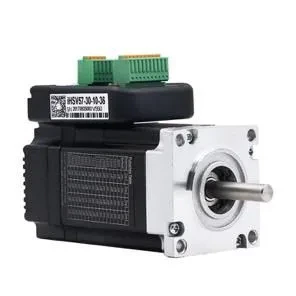 **Recommended: NEMA 23 integrated servo (57AIM30 class)**
* Standard build: 100W motor (recommended for most users)
* Higher power options: 140W or 180W motors increase available force; ensure your mount and fasteners are robust if you choose these.
If you purchase the motor from R+D, you’ll receive the correct cables and connectors. See Wiring Your Gold Motor
for step-by-step wiring.
Use only motors known to be compatible with the OSSM firmware and PCB. Third‑party clones may appear similar but can cause wiring or firmware incompatibilities.
If you source your motor from a third party (not R+D), you will need to program it before first use. See Programming Your Motor
for instructions.
### Electronics
**Recommended: NEMA 23 integrated servo (57AIM30 class)**
* Standard build: 100W motor (recommended for most users)
* Higher power options: 140W or 180W motors increase available force; ensure your mount and fasteners are robust if you choose these.
If you purchase the motor from R+D, you’ll receive the correct cables and connectors. See Wiring Your Gold Motor
for step-by-step wiring.
Use only motors known to be compatible with the OSSM firmware and PCB. Third‑party clones may appear similar but can cause wiring or firmware incompatibilities.
If you source your motor from a third party (not R+D), you will need to program it before first use. See Programming Your Motor
for instructions.
### Electronics
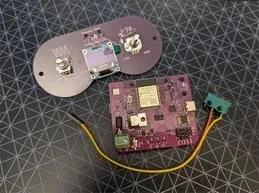 **OSSM PCB + Remote**
* OSSM control board (24V system)
* Remote: wired hand controller or the RADR wireless remote
Board specs: 24V input up to \~5A, step/dir outputs and PH‑4 connector, on‑board back‑EMF protection. See OSSM PCB Spec sheet
for details and limits.
After assembly, update firmware using the Web Flasher
. See Flashing your OSSM
for a step-by-step guide. For RADR setup, see Wireless Remote – Quick Start
.
### Mechanical components
**OSSM PCB + Remote**
* OSSM control board (24V system)
* Remote: wired hand controller or the RADR wireless remote
Board specs: 24V input up to \~5A, step/dir outputs and PH‑4 connector, on‑board back‑EMF protection. See OSSM PCB Spec sheet
for details and limits.
After assembly, update firmware using the Web Flasher
. See Flashing your OSSM
for a step-by-step guide. For RADR setup, see Wireless Remote – Quick Start
.
### Mechanical components
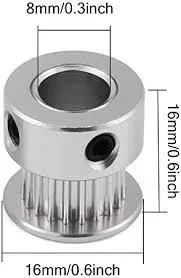 **GT2 pulley — 20T, 8 mm bore, 10 mm belt width**
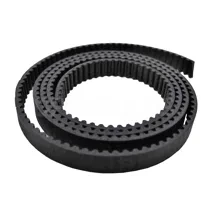 **GT2 timing belt — 10 mm width × 500 mm length (minimum)**
Buy extra belt (1–2 m). It’s inexpensive and gives room for tuning stroke length or future mods.
**GT2 timing belt — 10 mm width × 500 mm length (minimum)**
Buy extra belt (1–2 m). It’s inexpensive and gives room for tuning stroke length or future mods.
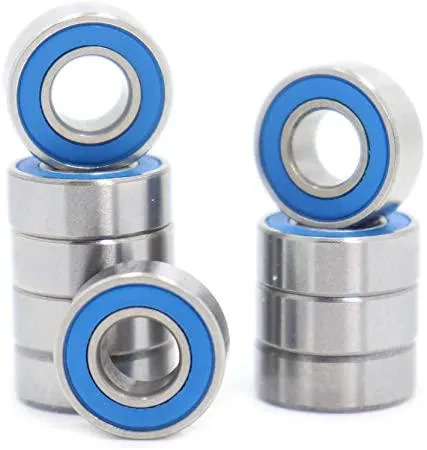 **MR115 bearings — 5 × 11 × 4 mm (Qty: 6)**
Grab a couple of spares if you can; small bearings are easy to misplace during assembly.
### Power supply
**MR115 bearings — 5 × 11 × 4 mm (Qty: 6)**
Grab a couple of spares if you can; small bearings are easy to misplace during assembly.
### Power supply
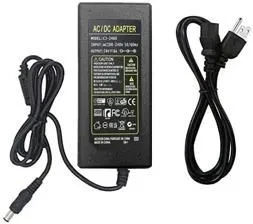 **24V 5A fully enclosed power supply**
* Input: AC mains appropriate for your region
* Output: 24V DC, continuous 5A
Use a safety‑certified supply (UL/ETL in the U.S., CE or local equivalent). Cheap, unlabeled supplies can sag under load and may damage the board or motor.
The PCB is designed for a 24V input and can deliver up to \~6A to the motor. See the OSSM PCB Spec sheet
for exact limits.
### Hardware
**24V 5A fully enclosed power supply**
* Input: AC mains appropriate for your region
* Output: 24V DC, continuous 5A
Use a safety‑certified supply (UL/ETL in the U.S., CE or local equivalent). Cheap, unlabeled supplies can sag under load and may damage the board or motor.
The PCB is designed for a 24V input and can deliver up to \~6A to the motor. See the OSSM PCB Spec sheet
for exact limits.
### Hardware
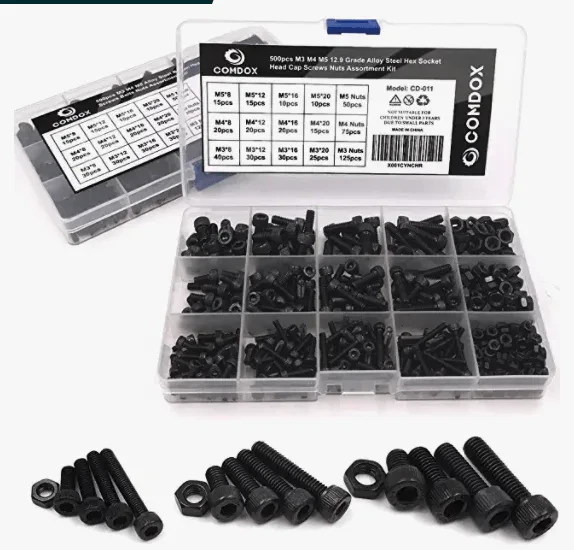 **Metric cap screw kit** (typical cost ≈ \$20 USD)
You’ll use M3, M4, and M5 fasteners in several lengths during assembly.
* Common M5 lengths: 20 mm and 25 mm
* Pivot mount: 4 × M5 × 35 mm
Include matching nuts and flat washers; nylon‑insert lock nuts are helpful for high‑vibration joints
Sort fasteners by length before starting and keep a few extras on hand. A drop of medium threadlocker on high‑vibration joints prevents loosening.
## Quick pre‑purchase checklist
* NEMA 23 integrated servo, 100W (or 140W/180W if needed)
* OSSM PCB and remote (wired or RADR wireless)
* GT2 pulley, 20T, 8 mm bore, 10 mm belt width
* GT2 belt, 10 mm width, ≥ 500 mm length
* MR115 bearings, 5 × 11 × 4 mm — Qty: 6
* 24V 5A enclosed power supply (UL/ETL/CE certified)
* Metric cap screw kit (M3/M4/M5) plus washers and nuts
Electrical limits, connectors, and protection details.
Correct wiring order and connector prep for the 57AIM30‑class motor.
Configure third-party motors before first use.
Update firmware using the Web Flasher tool.
Choose between the Basic or Extrusion mount and review their BoMs.
**Metric cap screw kit** (typical cost ≈ \$20 USD)
You’ll use M3, M4, and M5 fasteners in several lengths during assembly.
* Common M5 lengths: 20 mm and 25 mm
* Pivot mount: 4 × M5 × 35 mm
Include matching nuts and flat washers; nylon‑insert lock nuts are helpful for high‑vibration joints
Sort fasteners by length before starting and keep a few extras on hand. A drop of medium threadlocker on high‑vibration joints prevents loosening.
## Quick pre‑purchase checklist
* NEMA 23 integrated servo, 100W (or 140W/180W if needed)
* OSSM PCB and remote (wired or RADR wireless)
* GT2 pulley, 20T, 8 mm bore, 10 mm belt width
* GT2 belt, 10 mm width, ≥ 500 mm length
* MR115 bearings, 5 × 11 × 4 mm — Qty: 6
* 24V 5A enclosed power supply (UL/ETL/CE certified)
* Metric cap screw kit (M3/M4/M5) plus washers and nuts
Electrical limits, connectors, and protection details.
Correct wiring order and connector prep for the 57AIM30‑class motor.
Configure third-party motors before first use.
Update firmware using the Web Flasher tool.
Choose between the Basic or Extrusion mount and review their BoMs.